Friday, 28 June 2013

Cooking Rabbit


Rabbit Pie - ready to bake


I promised in an earlier blog to look at this wonderfully versatile , cheap  and healthy meat and I would like to share my all around approach to cooking it. Rabbit can be quite dry and the amazing reason for this is that the animals are so lean they are relatively fat free. That makes it a healthy and efficacious meat but can also make it difficult to keep moist through the cooking process. So I cook all my rabbit in a way that gives you many options concerning the final result but ensures that the meat stays juicy and moist while it's being cooked
Rabbit, jointed
.
So here is the way I tackle my rabbit cooking and in this instance I made a couple of pies from the cooked meat. 

Ingredients
At least a couple of rabbits, jointed
A couple of finely chopped onions
two or three cloves of garlic finely chopped.
Some bacon chopped finely - about four slices
A sprinkling of plain flour
a glass of red wine
a couple of springs of fresh thyme
two bay leaves
a nob of butter
a couple of tablespoons of olive oil
A good tablespoon of plum/blackcurrant/redcurrant jam or similar
chicken stock to cover the meat in the pot (or just water/vegetable stock)
Salt and pepper

To Turn the rabbit into a pie

A sheet of puff pastry
an egg lightly whisked
a couple of chopped carrots
a couple of potatoes chopped to about a couple of cms square
You'll need quite a large pot that can go on the hob and in the oven (set at about 180 degrees)
Melt the butter in the pan with the olive oil and sear the meat until it is lightly brown. Put to one side.
Add some more oil if needed, then add the bacon and the onions and saute these until they are translucent   and soft and the bacon slightly coloured. The bacon adds more fat to the rabbit. Now add the garlic and after a minute or so add back the rabbit, sprinkle with flour and stir in until all these lovely ingredients are amalgamated.


Now add the red wine and the stock to cover all the meat and top off with a good sprinkling of salt and pepper, the thyme sprigs and the bay leaves. leave to simmer away for 5 or ten minutes and then put the pot in the pre-heated oven for an hour or so.

You'll notice that my instructions are not exactly precise, but I think feel and taste is much more preferable than exact measurements and timings...
Now when the meat is cooked, take the joints out of the pan, leaving the sauce and put them on a separate plate. Also remove the thyme and bay leaves.

Here's the clever bit:
You can now:
 Put the rabbit away in the fridge (when it has cooled) to use later
Serve with chips and vegetables of your choice and some of the sauce on top
Cover the joints (when they have cooled) in egg floured breadcrumbs and shallow fry until golden
Or shred the meat from the bone and ......
Add back to the sauce with the carrots, potatoes and some peas and make a casserole, or top with mashed potato to make a Poacher's Pie or cook further until most of the sauce has been reduced to make a pie with a flaky topping.

A rich, unctuous casserole

For the latter, once the potatoes and carrots are cooked, but not mushy, (this is why I add them later) pour the contents into a pie dish and ALLOW TO COOL. This prevents a soggy pastry. 

Roll out you pastry until it is large enough to cover the pie dish and place on top AFTER you have egg washed the edge of the dish. Cut around the tin, removing the excess pastry and crimp the pie to the dish using your finger and thumb. Using a fork, make a couple of holes in the top to allow the steam to escape, egg wash the whole lot really well and put in a 180 degree oven until the pastry is cooked a nice golden brown.

That's it - a way of cooking rabbit to keep it moist and then the choice to do as you wish with it after. This recipe also works with pheasant.........and squirrel!


Saturday, 22 June 2013

Keeping Score


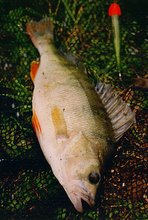
A flash of  cobalt in the late afternoon sun.


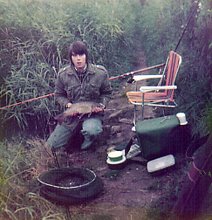
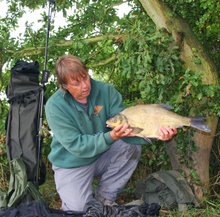
Most anglers can tell you, pretty much instantly, the weight and capture details of their largest fish. These details are embedded in the memory as strongly as the birth of a first child or the last winning of the FA cup by one's football team. (1980, for mine, sadly). Some anglers can go further - telling you more details of their most memorable catches, the dates, home and bait particulars.  Occasionally one finds an angler who can pretty much instantly tell you what he caught on 15th November 1978 and what he had for dinner afterwards. Most pike anglers know who I'm talking about. 

I used to keep a pretty strict diary with all this data itemised, but then I enjoy writing. Nowadays I'm happy to use this blog to capture the essence of the day more than just the bare bones of the results. It has become more important to me to look back on the memories of the day rather than just the statisics. Many anglers would say that angling is more than just catching fish, but sometimes it can take an inordinately long time to figure that out. I really used to enjoy writing about my social trips - especially Scotland - a country that is easy to romanticise and depict in writing. 

Non fishermen often ask what you think about when you're fishing; life, problems, philosophical dilemma, but all I ever usually think about is fishing. How to catch, what on, where. Harry and I pretty much chat about these things all through our sessions together particularly the where, and it's usually late in the day after a few fish have been caught before the topic turns to ' how's the wife?' or 'work ok?' Sad, but true. It doesn't mean we don't care, of course we do, but, well,  we're fishing and that's pretty important too. 

I do tend to keep a mental tally of "Fish versus Mike" as the day goes on. If I catch a fish, well that's one to me, if I get a take and miss it or the fish comes off before I land it, that's one to the fish.  It's not because I'm bored and have to keep my mind active either, it's just an aberration; I've always done it so I always  do it.  It's a funny thing but it keeps my mind active I suppose. 

Maybe I'm weird.  

Harry thinks I am. 

By the way, today's score was 3 - 2 to me!


Wednesday, 19 June 2013

Bees....


For the last few years bees have been in decline in the UK. There are many reasons for this, but certainly the weather has not helped.

In the last week I have found two nests in disused birds nest boxes. It seems that the Queen finds these nest sites while she is carrying eggs. She lays her eggs in her new nest and these hatch into her new workers creating a new colony which also attracts other workers from the area. 

Given that the one located in our garden has caused us to notice far more bees in our raspberry bushes, chive and thyme flowers, we are more than happy to leave the box where it is to help and be helped. Bees can only be good for a garden, whether it is a vegetable plot like ours, or full of flowers. 

So if you do find one, don't panic, leave them be(e) and let them get on with their vital task. They won't hurt you and if necessary you can move the nest a short distance after dark, but I wouldn't recommend it, view them as a bonus for your garden.

Saturday, 15 June 2013

Potatoes


An assortment of potato growing recepticles....


Everybody likes potatoes don’t they? And they are rather an adaptable vegetable that can be eaten as a side dish, main dish, starter or dessert.

Yes, dessert…you heard.

Anyway, I’m not going to talk about cooking with these wonderfully versatile tubers – I’m going to look at how easy they are to grow.

Most of our potatoes are turned into that mainstay of modern gastronomy – the chip, French fry or wedge…but, they are so adaptable, such an all round, flexible vegetable that the uses of it are far too numerous to explore.

So why don’t we grow our own more?

Because they are cheap?

Because they are difficult to grow?

Because we don’t have space?

I don’t know, but I think that the first answer is probably the most correct. Why bother growing your own when they are relatively inexpensive to buy? Well, bread can be cheap, but until you’ve tasted a loaf from the oven – sliced within minutes of being baked, warm enough to melt the butter spread upon it and experienced the taste and smell of really fresh bread – you can’t really understand why home-grown vegetables taste better than shop bought ones, why just picked raspberries are more succulent, more alive with flavour than supermarket fruits. Or why fresh potatoes – of a variety that you chose, chitted, planted and harvested yourself – taste much better than the run of the mill, limited variety potato from the Supermarket. Washing, peeling and cooking a spud just minutes from the earth is a whole different experience than using a potato that has been scrubbed and denuded of all the goodness from its skin, packed in a plastic bag, and hauled miles through heavy traffic to your shop – but maybe the real reason they taste so very different is that you grew it yourself!

And yes, that can make a real difference.

So how easy is it to grow your own?

Well, try this:

Find a large-ish pot.
Start to fill it with earth from somewhere until it’s two thirds full.
Place 3 – 6 old potatoes on top
Fill it with more earth
Water it occasionally
Wait
Once the greenery has flowered, wait three more weeks, longer if you can
Empty the pot
Eat all the potatoes within, at your leisure, in any way you wish.

It really is that easy, some magazines sell kits of seed potatoes, bags and earth – DO NOT BUY THESE KITS! They are a rip off, seed potatoes are just potatoes gone to seed…

You can also plant potatoes in the ground if you have the space….No, really.

Three or four potatoes planted could easily produce a couple of kilos of spuds within a couple of months.

There are over 4000 varieties of potato, so which one to choose?

Well, Pink Fir Apple is fun, tasty and waxy, Charlotte is large and multi functional, Anyas are great, but why not try a few different ones? Supermarkets sell Red Roosters – a popular line now -  and I have found these to be easy to grow, high yielding and tasty. Experiment, try various types that you like...

Have a go at growing your own potatoes – they are easy and great for kids to get involved with – all kids love potatoes – but so do most adults…
.

Chips, jackets, mash, sautéed, dauphinoise, creamed, rosti, roasted, boiled, curried, crushed, Boulangere...just to start with. They’re fun to cook with too..


Reclaimed woodland - with potatoes coming up...


Sunday, 9 June 2013

Enriched Doughs the Easy Way...

Completed cinnamon rolls...


Enriched doughs are normal bread doughs but with the additional ingredients of melted butter and sugar. These doughs are used to make bakes such as Belgian buns, Chelsea buns, pastries, danishes and cinnamon rolls...

Making these doughs the easy way is to use a bread machine on its dough setting to mix the ingredients and give them their initial proving. It takes the time element required to mix and kneed the dough away and, as most people have a machine but seldom use the dough setting, it might help make more use of a semi redundant machine and your time. 

By using a bread machine you can bypass much of the work, especially the kneading, by pouring the ingredients in a specific order into the machines pan.  This order ensures that the mix is not jeopardised by having the yeast and salt too close together and also ensures that the dough is well kneaded and given its initial rising in a safe and warm environment

Covered for the second proving..

You can then decide what to make,  a decision which don't I have used it to make a perfect cinnamon buns with a additional cinnamon and sugar added to the rolled out pastry here on the list of ingredients

Ingredients

150 mls semi skimmed milk
3 medium eggs beaten
75 grams butter, melted
450 grams strong white bread flour
2 tsp salt
50  grams caster sugar
1 sachet of fast yeast or 7 - 10 gms
100 grams of sultanas or raisins
50 grams of fine soft brown sugar
cinnamon powder to sprinkle over
Icing sugar and water to make glacé icing or use fondant icing


Ok, the ingredients go into the bread pan in this order:

The milk, the whisked eggs, the melted butter, allowed to cool slightly, then half the flour.
Now add the sugar, the salt and the rest of the flour. Top of with the yeast and start the machine.

When the dough program has finished, remove the proved dough and knock it back before rolling it out on a lightly (bread) floured surface. roll it out gradually until it's about 1 cm thick and forms a nice rectangular shape - you are going to roll it swiss roll stylee later - and sprinkle it all over with the sultanas, sugar and cinnamon - you can be as frugal or as extravagant as you wish with this part.

Roll the dough up and cut the roll into sections - about 10 large buns to about 15 or 16 small ones.

Place on a tray and cover with oiled cling film and leave to rise until they are light and fluffy and sticking together.

Place into a pre-heated oven (190 - 200 degrees) and bake for about 20-25 minutes until they are well baked and a lovely golden brown colour.

Mix your icing sugar with just enough water to allow it to be barely drizzled over all the buns, thickly. Or warm up the fondant icing and pipe over the buns.

Enjoy. 


Saturday, 1 June 2013

Veggie Jobs For June

Adding straw to strawberries helps protect the fruit

Well the unsettled weather looks to be settled in for June (!) according to the Forecasters, it's unfortunate that we can't seem to put together a string of sunny days that would allow the plants to gather up the warmth and convert it into growth, everything still seems a little spindly and undernourished.

There are jobs that need doing though and one that is often overlooked is to keep the area around your precious crops well hoed and weeded. There is a good reason for this - the nutrients in the soil are for your plants and if you share that goodness with a whole variety of unwanted weeds then the goodness is dissipated among them all. Keeping the areas well weeded, and dug over ensures that the soil is light and well drained. Ideally, in a perfect world, you should be able to bury your hand up to the wrist in it without digging- it should be that well tilled.


Broad Beans are in flower...

Earthing up potatoes is useful. As the first shoots of greenery come through, pile on more earth, this encourages the production of more potatoes and enhances the crop. You will see the old hands at the allotments leave soil piled up alongside the potato runs to facilitate this. 

Tumbling toms can be grown in hanging baskets

Tomatoes should be fed while they're in flower and remember to remove the shoots growing between the stem and the main leaves. Tumbling toms can be grown in hanging baskets but they will definitely need more water and feed. 

I planted my leek seeds in an old length of plastic guttering and just last week transplanted them into the outside vegetable bed. As they grow I will thin them out, but not until they are mini leeks and edible, much like a spring onion.  Lovely in salads as well as casseroles. 

Strawberries should have straw placed under the flowering plants to keep the drooping berries from the damp earth, keeping them clean and dry.

My beans are slow, but remember peas and beans always establish deep roots so while it may seem that not much is happening above the surface, the work is advancing underneath to set the foundations for good plants. Patience is required. 

Courgettes and sweet corn have been translocated from the poly tunnel into the outside beds - in full sun, if possible - but most vegetables want as much sun as they can get.  Give courgettes a go if you can, they are easy to grow and can be put in large pots. They don't need much work and pretty much look after themselves. Courgettes are always useful - and if you have any spare - well you could add them to a chutney...HERE

Remember to Keep your beds clear and clean - your vegetables will be much better for it. Just five minutes a day can keep all your beds weed free throughout the season.

Simple veggies like radishes should give early start to home grown salads